MERCURY DETECTION RECIPE

Mercury detection is relevant in fish and seafood, cosmetics, over-the-counter drugs and in other places around your home - want to find out more?
Click here to find out why Mercury detection is important and about the hazards of Mercury in your home.
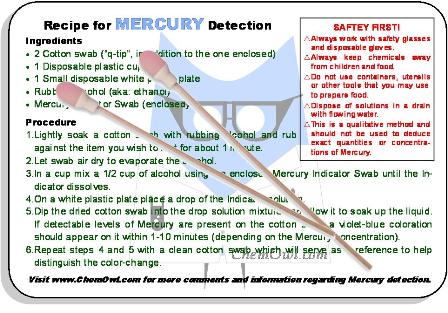
Ingredients
1 Cotton swab (“q-tip”)
1 Disposable plastic cup
1 Small disposable white plastic plate
Rubbing alcohol (a.k.a.: ethanol)
Water (preferably de-ionized)
Mercury Indicator: Phenyl-,2-phenylhydrazide
(can be purchased here)
Mercury Testing Procedure
1. Lightly soak a cotton swab with rubbing alcohol and rub against the item you wish to test for about 1 minute.
2. Let swab air dry to evaporate the alcohol.
3. In a cup mix a small pinch of Mercury Indicator with ½ a cup of alcohol. Label this solution – “Indicator”.
4. On a white plastic plate place a drop of the Indicator solution.
5. Dip the dried test swab into the drop solution mixture and allow it to soak up the liquid. If Mercury is present on the swab a violet-blue coloration should appear on it within 1-10 minutes (depending on the Mercury concentration).
6. Repeat steps 4 and 5 with a clean (untreated) swab which will serve as a reference to help distinguish the color-change.
Comments About Mercury Testing
• This method is qualitative and able to detect Mercury content down to 0.1%.
• When testing several items, be sure to check each individual surface with separate swabs and drop solution mixtures in order to avoid cross-contamination of the results.
• If Mercury is detected it is advised that you limit your exposure and contact a professional.
• Excess amounts of copper and iron may interfere with the test.
Mercury Testing Safety
• Always work with safety glasses and disposable gloves.
• Always keep chemicals away from children and food.
• Do not use containers, utensils or other tools that you may use to prepare food.
• Dispose of solutions in a drain with flowing water.
TRY OUR TEST KITS FOR ONLY $29.99! each
with FREE SHIPPING
Cadmium Test Swabs
Cadmium Test Tubes with Color Chart
BPA Test Swabs
Mercury Test Swabs
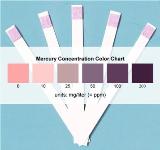
Mercury Test Strips with Color Chart
Hexavalent Chromium Test Strips with Color Chart
Parabens Test Swabs
Lead Test Swabs
Buy 2 Or More Test Kits
Get a FREE
BPA-Free Foldable Bottle
